In the previous post a number of charts were submitted that delineated the measurements patterns were drafted in different categories. It is rare for anyone to fit one of these measurement sizes exactly. We are all snowflakes I suppose. The below directions are for length and width adjustments for your patterns. These are not comprehensive pattern changes, just basic changes before you sew your first practice garment or muslin. Once basic length and width adjustments are made, any further alterations needed to tweak the pattern can more easily be determined and fitted. One adjustment this chapter does not give is a full bust adjustment which I think is important and should be done as a width adjustment.
After you select your pattern based on bust size for dresses and shirts or hip size for pants, take a look at your pattern.
Check your measurements against those for the size your have chosen.
Do not just cut the fabric a little wider at the hips or add at the hem to lengthen. By doing so, you may end up distorting the style lines of the garment. Make your comparisons of your measurements vs the pattern's measurements on the basis of the numbers on the envelope, not by measuring the pattern as the pattern may have added ease for comfort and style. The exceptions are the sleeve, hem and crotch lengths.
To make adjustments:
Materials: clear ruler,measuring tape, french curve, pencil, scotch tape, additional tissue paper or graph paper, paper scissors.
First trim your patterns close to the cutting lines and press with warm dry iron (you may trace if multisized,-- in that case, press pattern sheet, write over your cutting line with a highlighter, trace and then cut close to cutting lines of traced pattern).
Start with your vertical adjustments, then go to horizontal ones. You may need to lengthen the waist and shorten the hem or vice versa on your pattern. Once the lengths are correct, move to the reducing or enlarging the pattern sections at width points. The procedures are described below.
Mark your measurement changes on the pattern piece and then draw new cutting lines and stitching lines.
I find it best to lay out the extra tissue paper under the pattern I'm working on. I think it comes from watching so many Sandra Betzina videos.
Length Adjustments to Pattern Sections:
To Lengthen a Pattern Section
Most patterns have adjustment lines drawn where to cut for lengthening or shortening.
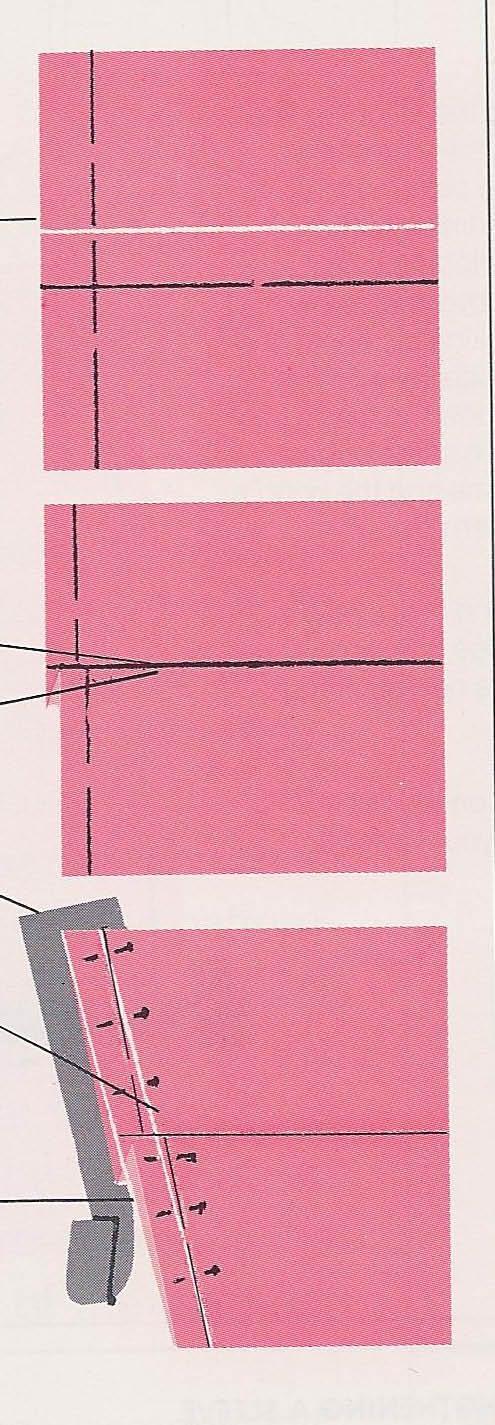
Step 1: Draw a line extending 2 inches on each side at right angle to the center of the adjustment line marked on your pattern.
Step 2: Cut along adjustment line.
Step 3.: Cut piece of tissue paper slightly wider than your pattern section and about 6 inches high. Draw a vertical line through the center of this piece as in Step 1.
Step 4. Pin the tissue to one side of the cut pattern piece so the drawn vertical lines are matched up. Measure the length adjustment and then pin the remaining pattern piece matching vertical line. Tape and remove pins.
Step 5. Redraw or "true" cutting and stitch lines. Trim extra tissue from side.
This is the basic operation for lengthening any pattern piece whether it be at the waistline, the lower portion of a garment (as for an A-Line dress/skirt or pants), lengthening at the crotch or a sleeve.
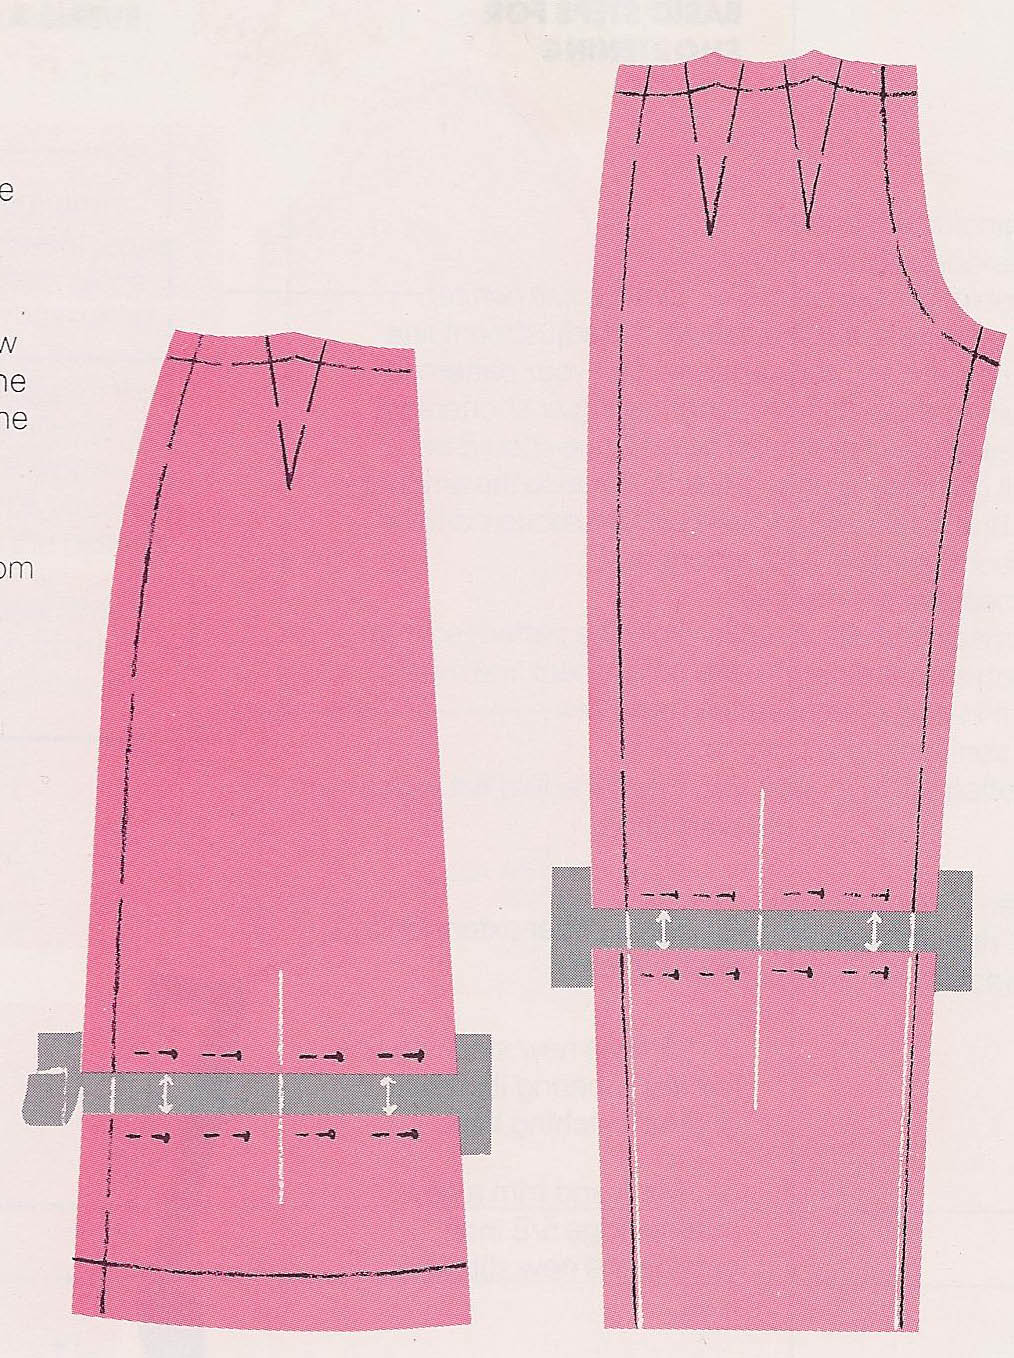
Waistline: For a 1 piece dress, compare your back waist length with the pattern envelope. Determine the amount you need to lengthen. Follow basic lengthening directions and do this for both front and back pattern pieces. Then you may proceed to determine hem length.
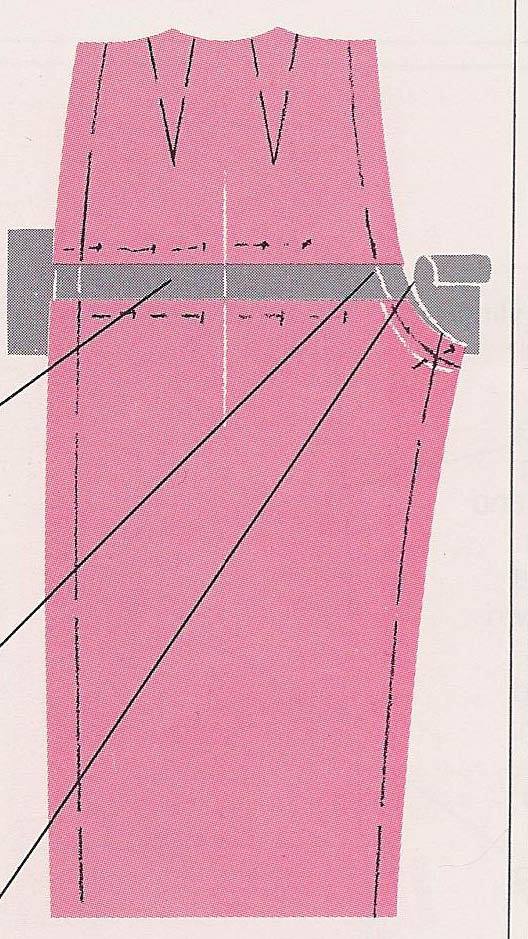
Lengthening at the Crotch: Compare your crotch length measurement with your pattern's, measure along the side of the pattern from the waist seam allowance to a point opposite the bottom of the crotch seam allowance. If your measurement is longer than the pattern's, you will have to lengthen the pattern at the crotch before you figure out your hem length. Divide the difference by 2 and use that figure to adjust each pattern piece. Use the adjustment line furnished by the pattern and follow Step 1-5. Make sure to do this on both sides of the pattern. Or for better accuracy measure front crotch length and adjust and then measure back crotch length and adjust as most have front/back measure differently.
Lower Portion of a Garment:
Dress & Skirt: Measure from your center front waistline of the garment against the length of the center front of the garment. Make sure this is done after waist adjustment.
Pants: Place a tissue paper under the pattern. Measure from your waist to hem at side seam. Mark your pants length measurement on the side seam of the pattern piece-- it may come below the pattern (this is to be done after the crotch adjustment). If your length is below the hem line, measure the difference. Follow Steps 1-5 to lengthen.
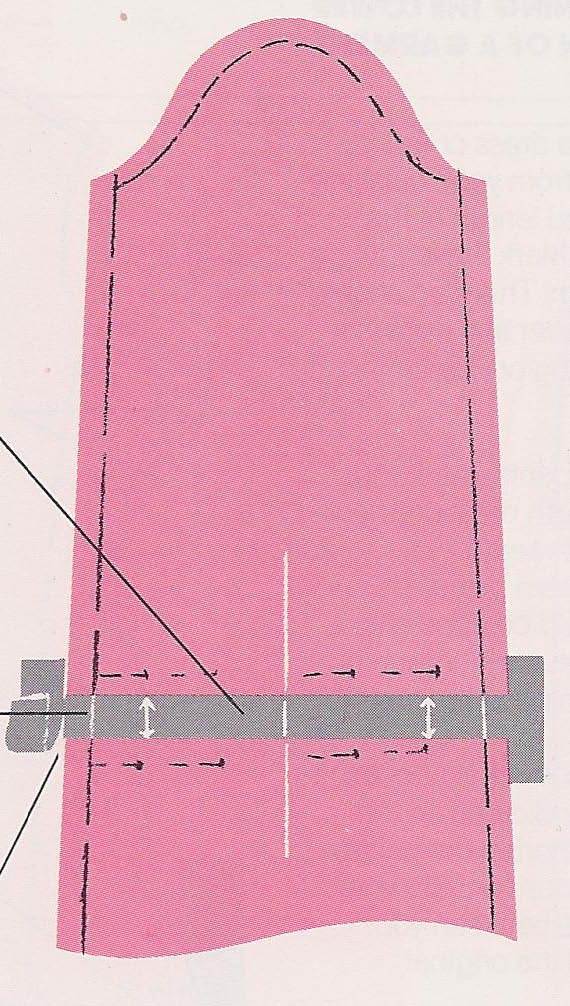
Lengthening the Sleeve:
Measure and compare your arm length measurement with the pattern piece measurement --measuring from the center of the seam allowance at the top of the sleeve to the hemline. You will lengthen if your measurement is longer. Follow Steps 1-5.
Shortening a Pattern Section:
 Basic Shortening Steps
:
1. Draw a horizontal line above the adjustment line marked on your pattern piece that is exactly equal to the amount the pattern section is to be shortened.
2. Fold the pattern so the adjustment line meets your drawn line. Press flat with warm iron. Tape.
3. Tape a paper extension to the side of your pattern and true the new cutting edge., Draw in a new stitch line. Trim.
Shorten at waistline: For a one-piece dress, compare your back-waist measurement with the measurement printed on the pattern envelope. Determine the amount needed to shorten to equal your own measurements and follow the above directions steps 1-3 on both front and back pattern pieces.
Shorten at crotch: Again, measure your crotch length and compare it with the pattern measurements. Divide the difference in 2. Using the adjustment lines make the changes needed as described in steps 1-3 for both the front and back. Or for better accuracy measure front crotch length and adjust and then measure back crotch length and adjust as most have front/back measure differently. This must be done before adjusting hem length.
Shortening the lower portion of a garment:
Dress/Skirt: Measure from your waistline to desired hem length, mark the length on the pattern (add hem allowance). Or shorten the pattern by the difference between you mark and the original hemline. Follow steps 1-3.
Pants: Mark your pants length measurement on the side seam of the pattern piece, shorten using steps 1-3. Do this after crotch adjustment.
Shortening a Sleeve: Compare your arm length measurement as for the lengthening section -- to the pattern length from top of seam allowance of shoulder to the hemline. Fold and extend the pattern as described in steps 1-3, redraw the cutting lines and trim. This may need to be done with cuff pinned at seam allowances to determine lengths of cuffed sleeves so more than one pattern piece will need to be altered.
Width Adjustments To Pattern Sections
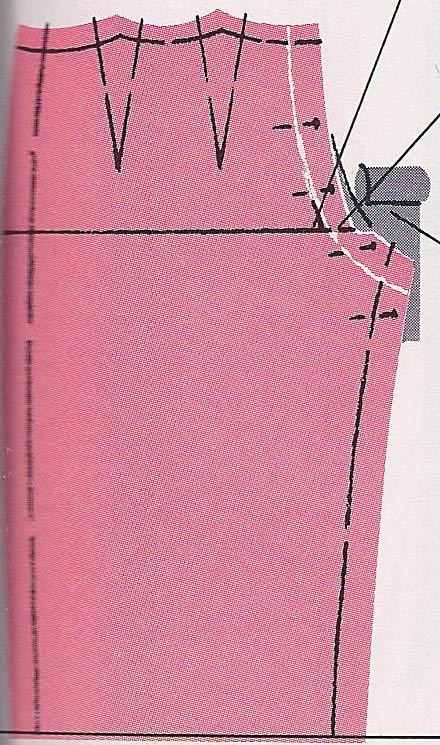
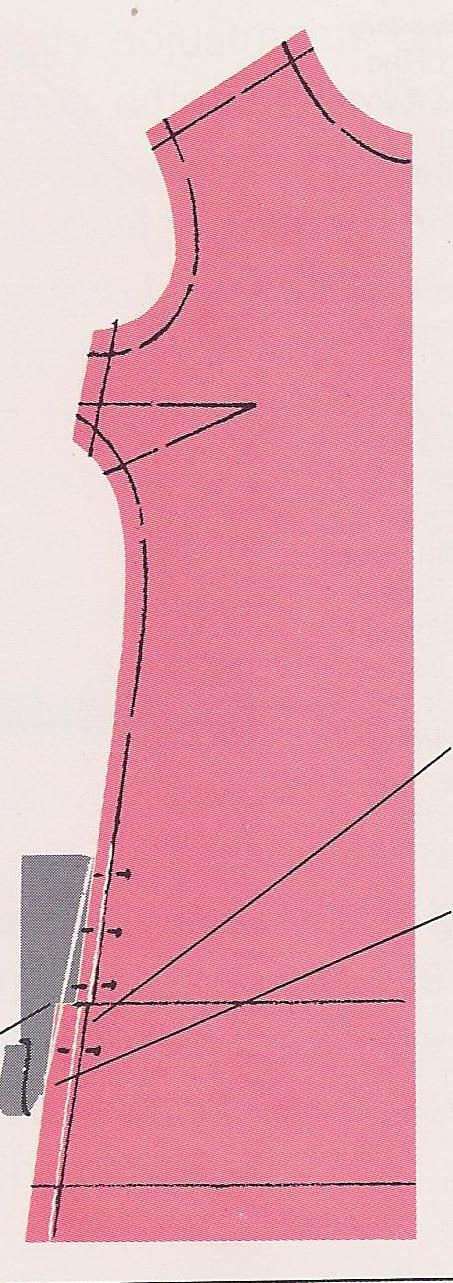
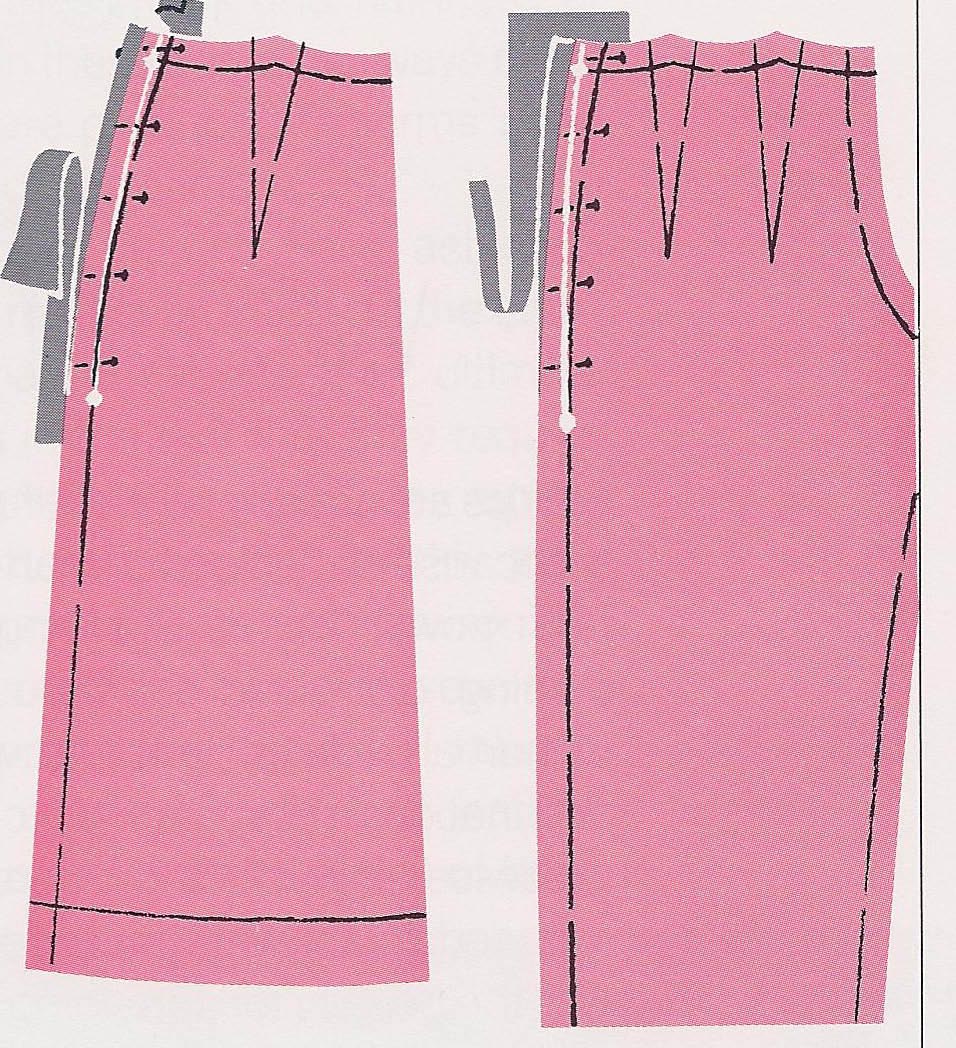
Determining how to alter the width of a garment pattern piece one must consider there are 4 edges that will be altered in the simplest of patterns. Therefore, any difference in circumference will need to be divided into four to determine where to make increase or reduction to ensure balanced side seams.
This book or system uses a dot system in which you measure, mark and then using a french curve, redraw the lines meeting the dots.
Reducing a Pattern Section
Basic Steps:
1. At the point where you need to reduce your pattern piece, measure in from the stitching line, mark with pencil 1/4 of the total amount to be reduced on each side seam.
2. Draw a new stitching line using French Curve graduating the curve from the point of reduction to the original stitching line.
3. Add seam allowance and draw in cutting line. Trim.
Small Bust Adjustment: I wasn't sure if I could find a great SBA tutorial for you but I saw this one and it looks pretty good. If you are a little confused as to the concept, look at the FBA tutorial and make the same lines only instead for spreading, you will do the opposite. You can do this with the pattern piece pinned to your in front of the mirror. Use pins to fasten, then take down and tape the adjustments, true seams.
http://hungryzombiecouture.blogspot.com/2007/03/my-cup-does-not-runneth-over.html
I recommend the Palmer-Pletsch book Fast Fit for Real People for really good directions for different types of bodices (princess seam, etc.).
Reducing at Waistline and/or Hipline: For a one piece dress, skirt or pants: Compare your waist measurement and hip measurement with that printed on the pattern envelope. Make your waist mark using 1/4 of the difference and also make your hip mark. Follow steps 1-3 using French curve to draw in new seam line and cutting lines. Repeat for back section.
Enlarging a Pattern Section
Basic Steps for Enlarging:
1. Lay your pattern piece on a strip of paper cut to extend about 2 inches underneath the pattern and about 2 inches beyond the edge. Tape or pin pattern to paper.
2. At the point where you need to enlarge your pattern piece, measure out from the stitching line and mark 1/4 of the total amount to be enlarged on each seam. Measure as far into the seam allowance or paper as necessary.
3. Draw a new tapered stitching line from the point of enlargement into the original stitch line with a French curve, trueing the seam. Mark and trim the new cutting line.
Full Bust Adjustment --I could try to duplicate theses great directions but why when I can show off this great blogger?
http://sew-la-fabric.blogspot.com/2010/04/full-bust-adjustment-aka-fba.html
Enlarging at the waistline and hipline.
For a one piece dress, skirt or pants, compare your measurements with the pattern envelope measurements and divide the difference by 4. Add that to the point on your pattern. I like to also do the same with the hip to ensure correct fit as well as the under bust. Using a French curve, true the seam lines, add the cutting lines and trim. If it is just pants or skirt, no need to check underbust, just draw up to end of pattern and follow the steps 1-3.