Showing posts with label history. Show all posts

Thursday, March 29, 2012

Volume 1, Chapter 4: Assembling, Fitting .... Part 1

Chapter Four starts out talking about fit, how important it is to fit the garment so it is flattering and that it is done correctly without shortcuts.  Presumably you have already done some adjustments to the pattern so it has wide enough circumference and length.  Basically, the writer feels that it is important to baste the garment together -- darts first, then seams, baste pockets to the garment after seams are sewn to ensure they are positioned in the best place.  She also suggests basting the zipper in first to ensure correct neck fit.   It is better and easier to unpick a basting stitch than a construction stitch.  Correct sewing technique is also important to make your clothes last longer and look good. 

 Page 88 digresses into fashion history-- the evolution of pockets, buttons and buttonholes, pleats, hems and zippers.  Then on page 90 there is a blurb about hemlines and Wall Street-- higher skirts when times are flush and longer when times are tough.  There is a pretty cool picture of skirt lengths through the decades although it seems like even though the 1950's was prosperous, skirts were still longer than the 1940s (due to fabric shortages in the 40's probably but then that contradicts the whole theory).

My take on this is that while there are some great productivity shortcuts that can be employed when sewing garments, it is probably best to use those with tried and true (TNT) patterns that have already been fitted.  You can even trim out the seam allowances to 3/8's inch to eliminate lots of trimming and clipping.  But with a new pattern, it is probably better to follow the advice in the book-- but I like to just baste a muslin together first before I cut my fashion fabric.  Once all your changes have been applied to the paper pattern, you are golden until you have some weight/size changes in which you have to start all over again.  If you are like me and have frequent weight fluctuations, you might want to write the date, your weight and key measurements (bust, hip) on the pattern and save it as you might see that size again.  Sometimes shooting a picture and putting it in the pattern is good too.  The best way to get better at sewing techniques is to practice them.  Which is kind of a pain as I would rather be making something rather than doing drills.  But once you do 10 welt pockets or bound buttonholes, they become less difficult or intimidating.  Yesterday I was at the Salvation Army and looked at a short sleeved top made from the 70's in that thick polyester.  It had bound buttonholes!  Totally unexpected.
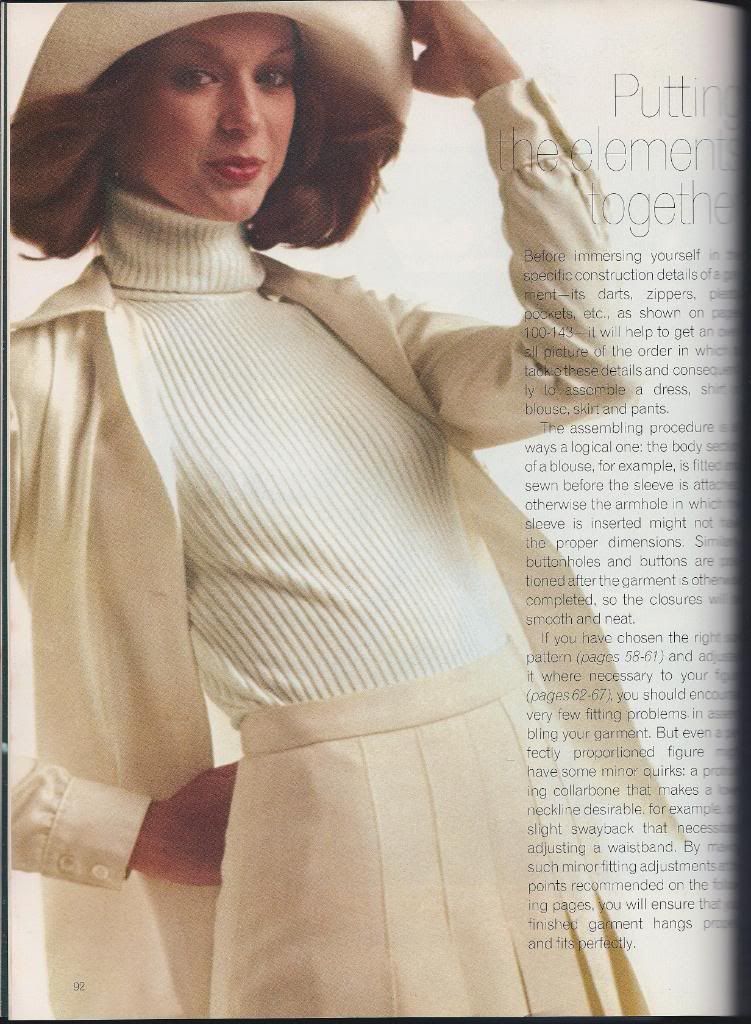
The next section in this chapter gives an overview on putting different key garments together-- dress, shirt, women's blouse, skirt, women's pants, men's pants.  The author does not delve into technique here.  This would be a cool exercise to do with the TNT wardrobe sew-alongs, 6-packs, and SWAPs going on this year.  The overviews are basically order of assembly directions.  What is neat is they give little advices for example, on page 97 at Step B for the skirt assembly, it tells you to baste the darts if there are any, baste the seams and try on the skirt.  The next step says "if the waist dart is too short, it will pucker at the tip when tried on and the skirt will have extra fabric at the hip or abdomen.  Correct it by placing a pin 1 1/2 inches above the fullest part of the upper hip or abdomen indicated by an "x" on the drawing (as usual nicely shaded drawings illustrate all the garment construction steps) and tapering the dart to the pin, Re-baste the dart."  The description then goes on to tell you what to do if the dart is too long or if it points in the wrong direction.

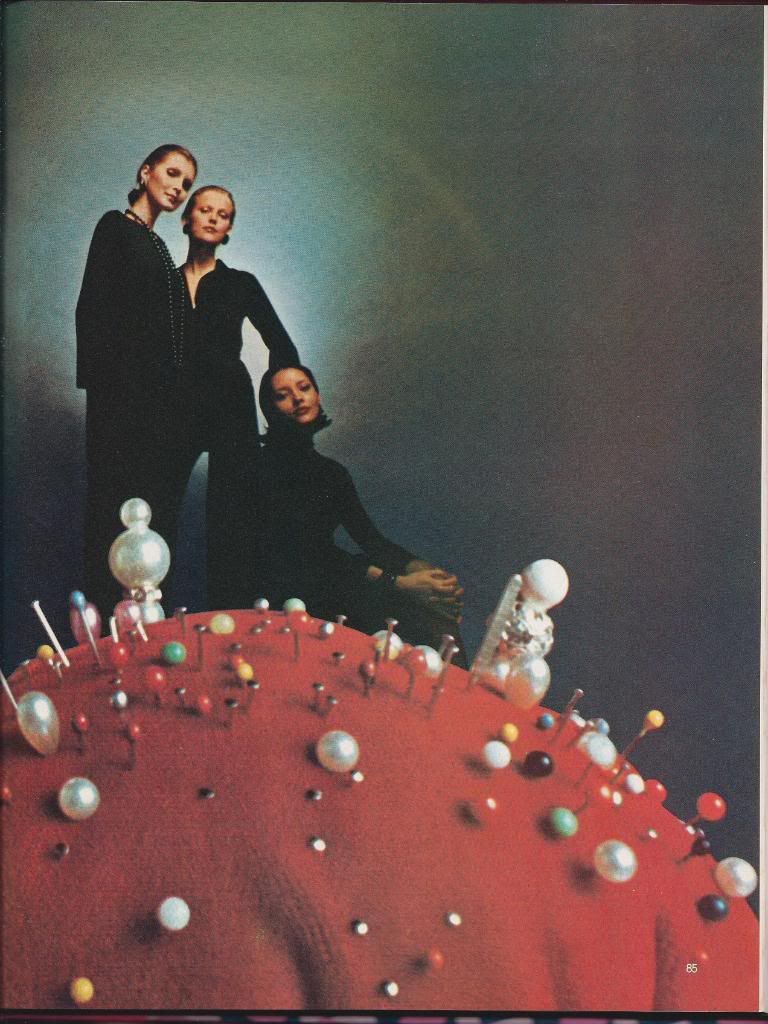
The pictures in this chapter of which I have shown 2 of them are very 70's cool.  I love the cream skit and the flip hairdo.  I think today, that would be too much cream and probably too covered up--turtleneck with long-sleeved overshirt?  I would wear a different color jacket but the garment styles are still relevant and would not look out of order today.

The drawings of the different garments for the assembly directions are in 2 tone blue with black stitch lines to illustrate the seam lines similar to the old McCalls two color pattern instructions from the 1970s.  They title the clothing items as "The Classic Dress and show one with bust darts and one with princess seams, "The Classic Shirt" which could be a man's shirt or a woman's shirt but has no collar stand nor bust dart, "The Classic Blouse" which has sleeves gathered at a smaller cuff and bust darts, "The Classic Skirt" which allows for pleats and/or darts and a waistband and zipper also another model with a front closure; "The Classic Women's Pants" with darts, zippers, waistband, no waistband/facing and pockets; "The Classic Men's Pants" with the standard fly, pocket and waistband.


Monday, April 4, 2011

V1C3: Tools for Precision Cutting


The tools for laying out, securing, cutting and marking have a rich heritage.  We take these tools for granted today as pins are now cut from a single piece of metal and are packed into boxes or thrust into crimped paper by robotic machinery.  Early pins were made by hand from brass or iron and the tops were crimped or bent at the top--  sounds crude but even these were considered a luxury.  That is where the terms "pin money" and the practice of picking up a stray pin as a thrift behavior and bringing good luck. Pincushions were popular and had many different names "pimpilowes, pimpilos, pimplos, pimploes or pyn-pillows."  These were lavishly embroidered, made in fanciful shapes, sewn by hand and even worn as ornaments.  During the reign of Elizabeth I, no lady of the court was found without their pincushions and the Queen herself was presented with one as a New Year's gift-- (a very elaborate embellished one for royalty, of course).  In the 18th century the "pin poppets", small hand wrought ivory cases and other such devices were popular and became heirlooms passed down from one generation to another.


Tape measures themselves were also kept in valuable ornamental housing made of wood, brass, bone ivory or mother of pearl with little inventive devices to wind the tape.  The tape measures themselves were ribbons with measures embroidered or inked upon them-- were not always standard and made of different lengths--they were not uniform.  It wasn't until the 19th century that a yard length became standard.  Measures were commonly subjective.  In Medieval England the lengths of fabric to purchase were measured with the length of an arrow until the 12th century in which a yard was length of the King's arm with the first joint of the thumb thrown in for good measure.  The King's foot was the foot measure of 12 inches or three barleycorns laid end to end.  This continued until the 16th century when the "ell" -- a 45 inch unit was developed.  An ell stick was marked with nails every 2.5 inches (a meteyard" which tape measure where then modeled on.  Eventually "standards" replaced the ell and were made from carefully prepared metals and kept in controlled environments to prevent degradation.  Once technology was developed, the standards were then measured and developed precisely based on light wavelengths.


Scissors also evolved from beautiful art objects to utilitarian efficiency.  Upper class people would keep the ornate craftsman-made scissors safely in special cases to protect them but the lower classes had basic iron scissors to use that did not cut well until steel making refinements in the late 19th century were developed.  Notched steel wheels also were developed for pattern tracing ("Harpers Copying Wheels"-1875) not much different from our marking tracers today that we use with carbon or chalk papers.  Of course a smooth wheel was developed for use with knits to prevent snagging the threads and causing runs.

Friday, February 4, 2011

V1C2 The Sewing Machine, The Iron, Needle, Thimble, and Thread Part 3


The Sword and Shield 


Throughout history, In order to sew a seam, the very basic  tools needed are a needle, thimble and thread.  While the need to sew all seams by hand has remarkably decreased with the sewing machine available as a power tool allowing much more speed in constructing garments, the need for sewing by hand has not been eliminated.  You might want to use hand sewing if you are interested in period correct historic costume or couture construction.


 In the 14th and 15th centuries, good needles were prized possessions.  They were difficult to source and found at festival times when peddlars traveled to the villages and towns to sell their wares.  Most households had only one needle.  Most people only had one outfit to wear (unless they were wealthy).  These bronze needles were somewhat crude and often bent to prevent them from sliding out of the fabric being sewing when put aside.  Legend has that the steel needle was developed by the Chinese soon after the silk fiber was discovered by the Empress (how soon after is in question as there was no steel in China at that time).

As the finer steel needle developed and was available into the reign of Queen Elizabeth from the metalsmiths of the Middle East, needlework became even more elaborate and detailed.

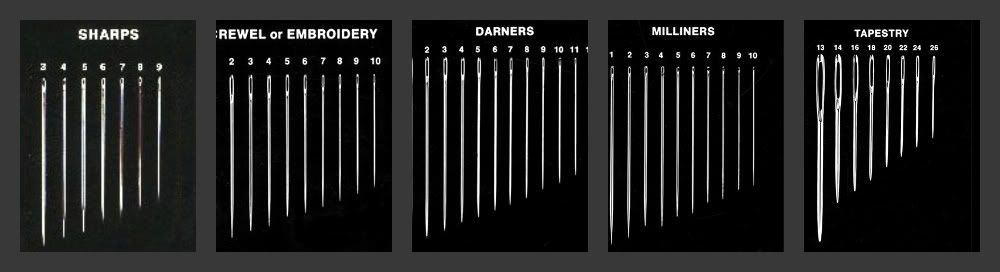
The needles developed then and are now needles we still use today-- Sharps  are what we use most often in our households; Straws, or Milliner's needles were often used to make straw hats, thicker blunter needles called Blunts, used for skill-building young women in embroidery and by tailors and cobblers to sew with leather and heavy fabrics.

click to enlarge


Needles today are available in 24 sizes. The higher the number, the smaller the needle.


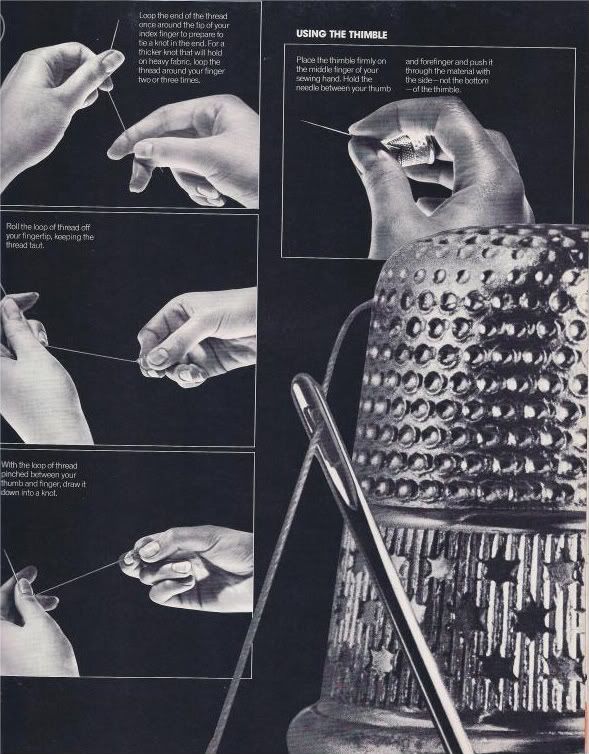
Thimbles were also developed in the earliest centuries. The Art of Sewing Volume 1 shows a picture of a bronze thimble found in Syria dated to 300 BC. The correct way to wear a thimble is on your middle finger of your needle or sewing hand. I'm left-handed so it would go on my left second finger. Your thimble should be lightweight and have deep enough ridges that your needle will not slip. The use of the thimble is to push the needle through the fabric using the side of the thimble, not the tip. There are a variety of thimble types available.


Sunday, January 30, 2011

V1C2 The Sewing Machine,The Iron, Needle, Thimble, Thread: Part 2 of 3--THE STEAM IRON

These irons were used --before electricity.  The one on the left was heated with natural gas.  On the right is a "self heater" into which hot coals were placed, the conventional "iron" that was placed on the stove--many households had a few of those so one would heat while the other was in use; at the bottom are a brass iron that had a metal core that was heated separately in a stove and an early 20th century one in which the handle detaches whilst the iron heats.  I can only imagine the burns as I am pretty clumsy.  However, in light of going green, these irons may prove useful in a post-peak world.   There could be a market.....


The history of the iron is pretty much a horror story.   There were the irons that were heated on a stove, ones that used gas or coals placed inside.  I don't believe there was much in the way of heat regulation.   I cannot imagine using the irons of the past.  I can only imagine the burns women would suffer while ironing.  Considering everything was pressed and startched in the 18th and 19th century.... the modern steam iron, the dryer and permanent press fabrics are wildly liberating technology.  

A good quality steam iron is integral to constructing quality made garments.  You can find one at a department store; you usually cannot go wrong with an iron from the price point of about $35 and up. Sometimes they can be found on sale.  I purchased my Conair from Big Lots for about $20.  Conversely, there are gravity feed steam irons and semi-professional hand steam irons that cost $300 and up.


The issue with modern irons and modern fabrics is to really pay attention to the heat, especially when working with synthetics and synthetic/natural blends.    The best course of action is to use pressing cloths and experiment with scraps.  Start by setting the iron a little lower in temperature than is recommended to allow for variation among different brands and models of irons.  Newer fabrics and chemical finishes can melt or become warped when given too much heat.  Also, pay attention to interfacing. There are low heat varieties available if you are sewing with poly heat sensitive fabric.


When you think about sewing, you may as well think about pressing.   You use the iron from the very beginning and throughout the entire sewing process. First you press out wrinkles in the pattern (don't use steam!); then pressing the yardage before you lay the pattern pieces out.  After cutting, you are using the iron to fuse interfacing.  Once you start to sew, pressing seams, steaming areas eased, darts and hems -- you go from the sewing machine to the iron back and forth.  You may as well have them next to each other if time is of the essence.  The iron is integral in the construction of a garment, you use it to give it shape and provide clean lines.  The difference between a garment constructed with pressing and without is stark.  It makes all the difference.


For a great treatise on the importance of pressing and the amazing difference it makes in your sewing please read: Gorgeous Things' Blog: And Now, a Word from the Pressinatrix 

For ideas on how to incorporate the pressing in with the sewing see Gertie's New Blog for Better Sewing


It is important to use the appropriate technique of pressing.  Ironing is when you drag or slide the hot iron along the fabric-- a long gliding movement you don't want to go backwards or you might put in wrinkles.  I use this technique when pressing yardage before laying it out. 

Pressing is when you press the iron straight up and down with even pressure.  I use this to press seams and apply interfacings.  

Detail pressing is when you use the point of the iron only and your hands to press confined spaces. I use this technque with collars when pressing open seams on a point presser, when pressing cuffs on a shirt and when pressing hems before sewing.  Don't forget to use pressing cloths to avoid damaging the fabrics.  It is good to test.  A variety of press cloths are necessary for different fabrics.  I keep a silk organza, a thick cotton, and a medium cotton as well as cheesecloth and vary them depending on the fabric of my project.  

Some other tools you may want to use while ironing are hams, ham holder, point presser, clapper, arm board or sleeve seam board, pant seam board, velvet or needle board.  We will talk about the use of these tools later in the series.