There are many different hand stitches one does in the construction
of garments. They are used for basting, thread marking stitching lines
and permanent finishing stitches.
Basting is used with a single thread no more than 30 inches long. When used to mark a seam line, they are sewn directly on the seam line markings (whether markings are tailor tacks or made with marking implements like chalk liners or transfer paper). When they are used to fit-- sew the basting line a fraction inside or outside the seam line -- these will be removed and have trace. When basting a knit garment, begin them with a loose fastening stitch as the stretch of the knit could pull it out- - also sew loosely to allow for stretch with a smaller stitch that would be used on wovens.
When sewing permanent seams, don't use any longer than 18 inch strand of thread.
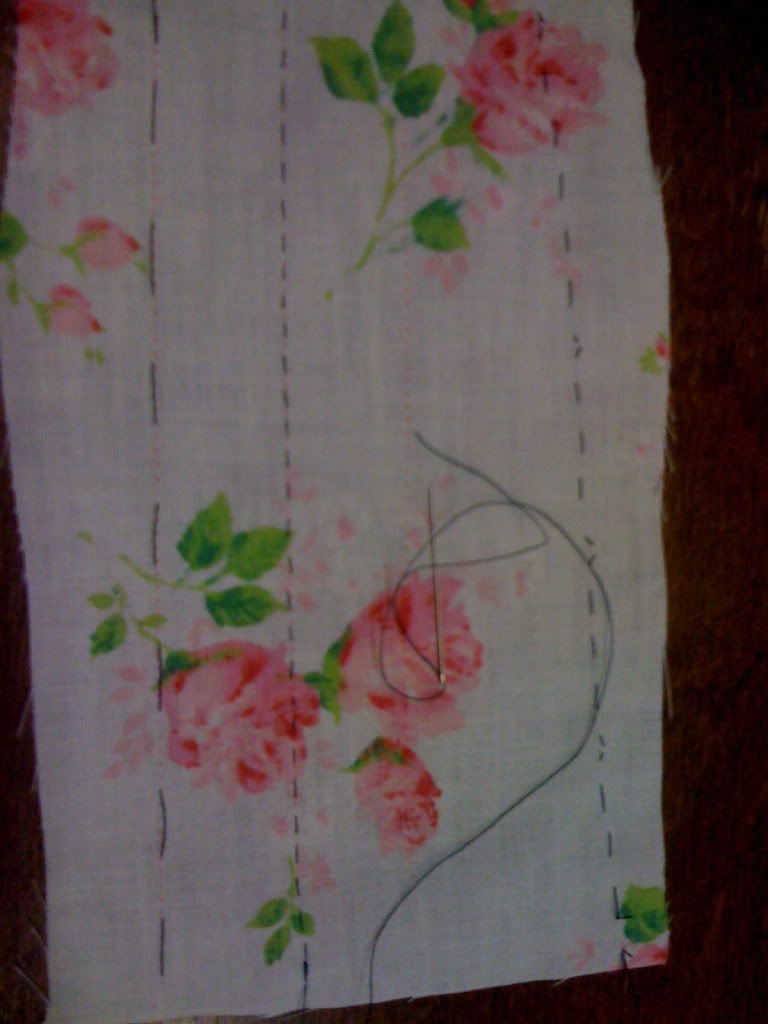
The Fastening Stitch: "to anchor the thread--draw the needle up through the fabric from the wrong side and pull it through, leaving a 4 inch loose end, insert the needle back 1/4 inch. Bring it out at the point at which it first emerged, then pull the thread through. Insert the needle back over the first stitch and bring it out 1/4 inch ahead . After anchoring the thread in this fashion, proceed with the desired stitch." (It is very easy, just a backstitch over your first stitch).
The Basting Stitch: for markings and temporary sewing

The Running Stitch: to mark or baste small areas and to topstitch
The Overcast Stitch-- to finish seam edges.
The Rolled Hem Stitch-- for lightweight fabrics
The Catch Stitch-- to hem knits and heavy fabrics
The Slip Stitch-- to hem folded edges
Buttonhole stitch
Professor Pin Cushion to the Rescue:
Basting is used with a single thread no more than 30 inches long. When used to mark a seam line, they are sewn directly on the seam line markings (whether markings are tailor tacks or made with marking implements like chalk liners or transfer paper). When they are used to fit-- sew the basting line a fraction inside or outside the seam line -- these will be removed and have trace. When basting a knit garment, begin them with a loose fastening stitch as the stretch of the knit could pull it out- - also sew loosely to allow for stretch with a smaller stitch that would be used on wovens.
When sewing permanent seams, don't use any longer than 18 inch strand of thread.
The Fastening Stitch: "to anchor the thread--draw the needle up through the fabric from the wrong side and pull it through, leaving a 4 inch loose end, insert the needle back 1/4 inch. Bring it out at the point at which it first emerged, then pull the thread through. Insert the needle back over the first stitch and bring it out 1/4 inch ahead . After anchoring the thread in this fashion, proceed with the desired stitch." (It is very easy, just a backstitch over your first stitch).
The Basting Stitch: for markings and temporary sewing
The Running Stitch: to mark or baste small areas and to topstitch
 |
The Overcast Stitch-- to finish seam edges.
The Hemming Stitch--for bound or raw edges
The Rolled Hem Stitch-- for lightweight fabrics
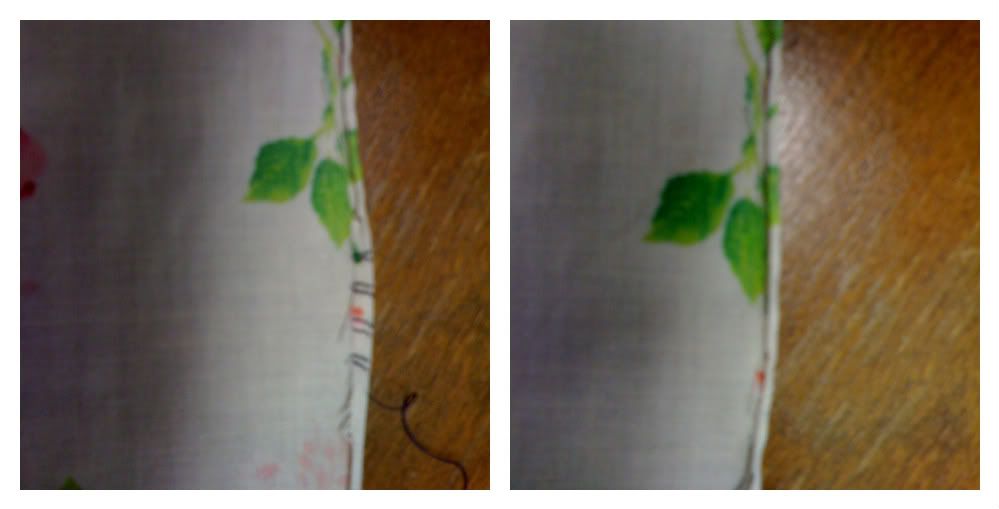 |
| The stitch ends up looking like little parenthesis 1/4 inch apart. After 4 of them (or 1 inch), pull gently with the thread and they disappear like magic. |
The Catch Stitch-- to hem knits and heavy fabrics
The Slip Stitch-- to hem folded edges
Professor Pin Cushion to the Rescue:
